> ## Documentation Index
> Fetch the complete documentation index at: https://auth0.com/ai/docs/llms.txt
> Use this file to discover all available pages before exploring further.
# Get Salesforce Opportunities
> Use OpenAI, NextJS, and the Auth0-AI SDKs to get Salesforce opportunities
export const AccountLinking = ({connectionLabel = "any Identity Provider"}) => <>
Account Linking
If you're integrating with {connectionLabel} and want users to be able to sign in using a different
method (e.g., username and password or another external provider), you need to link
these identities into a single user account. Auth0 refers to this process as{" "}
Account Linking
.
Account Linking is separate from{" "}
Connected Accounts for Token Vault
:
- Account Linking merges multiple Auth0 identities into one user profile for sign-in.
-
Connected Accounts for Token Vault allows that signed-in user to authorize an external
provider so Auth0 can store the provider's tokens in Token Vault.
If your application uses{" "}
Organizations, authenticate the
user with the target organization before initiating the Connected Accounts flow. Organizations
define the session context; they do not create a shared external account for the organization.
Account Linking logic and handling varies depending on your app or agent.
You can find an example of how to implement it in a{" "} Next.js chatbot app
. If you have questions or are looking for best practices,{" "}
join our Discord and ask in the{" "}
#auth0-for-gen-ai channel.
;
export const CustomApiClient = ({apiName = "the external API"}) => {
return
The Custom API Client allows your API server to perform token exchanges
using{" "}
access tokens
{" "}
instead of{" "}
refresh tokens
. This client enables Token Vault to exchange an access token for an
external API access token (e.g., {apiName}).
-
Navigate to Applications > APIs
-
Click the Create API button to create a new Custom
API.
-
Go to the Custom API you created and click the{" "}
Add Application button in the right top corner.
-
Once you've added the API as an application, click the Configure Application button
in the right top corner.
-
Note down the
client id and client secret{" "}
for your environment variables.
;
};
export const SalesforcePrereqs = ({lang, createCustomApiClientStep = false}) => {
const languageSteps = [];
if (lang === "js") {
languageSteps.push(
Install Node.js 20+ and npm
} />);
} else if (lang === "python") {
languageSteps.push(
Install Python 3.11+ and pip
} />);
}
const commonSteps = [
Complete the{" "}
User authentication quickstart
{" "}
to create an application integrated with Auth0.
} />,
Set up an OpenAI API key
.
} />,
Set up and configure a Salesforce instance with an{" "}
External Client App
.
} />,
Set the SALESFORCE_INSTANCE_URL in your .env{" "}
file
}>
SALESFORCE_INSTANCE_URL=https://your-instance.salesforce.com
,
Configure a Salesforce OIDC connection
{" "}
in Auth0.
}>
-
Under the General section, ensure the following{" "}
Scopes:
-
openid
-
api
-
refresh_token
-
offline_access
-
Under the Purpose section, make sure to enable the{" "}
Use for Connected Accounts with Token Vault toggle.
];
if (createCustomApiClientStep) {
const step = CustomApiClient({
apiName: "Salesforce API"
});
commonSteps.push(step);
}
return <>
Prerequisites
Before getting started, make sure you have completed the following steps:
{[...languageSteps, ...commonSteps]}
;
};
## 1. Define the Vercel AI tool and backend API route
Create an AI tool that gets a list of opportunities from Salesforce and a backend route that uses Auth0 to get a Salesforce access token:
* When the tool calls `auth0.getAccessTokenForConnection()`, pass `sfdc` as the connection name to get a Salesforce access token.
```tsx app/api/chat/route.js wrap lines theme={null}
import { openai } from "@ai-sdk/openai";
import { streamText, tool } from "ai";
import { z } from "zod";
import { auth0 } from "@/lib/auth0";
export const maxDuration = 60;
export async function POST(req) {
const { messages } = await req.json();
const system = `You're a helpful AI agent that helps analyze salesforce data`;
const response = streamText({
model: openai("gpt-4o"),
messages,
system,
maxSteps: 10,
tools: {
listOpportunities: tool({
// salesforce tool call to get a list of opportunities
description: "Get a list of opportunities from Salesforce",
parameters: z.object({
limit: z
.number()
.default(10)
.describe("The maximum number of opportunities to return"),
}),
execute: async ({ limit }) => {
const instanceUrl = process.env.SALESFORCE_INSTANCE_URL;
const endpoint = `query/?q=${encodeURIComponent(
`SELECT Id, Name, StageName, CloseDate FROM Opportunity LIMIT ${limit}`
)}`;
const url = `${instanceUrl}/services/data/v57.0/${endpoint}`;
// call auth0 to get the access token
const { accessToken } = await auth0.getAccessTokenForConnection({
connection: "sfdc",
});
const response = await fetch(url, {
method: "GET",
headers: {
Authorization: `Bearer ${accessToken}`,
"Content-Type": "application/json",
},
});
return await response.json();
},
}),
},
});
return response.toDataStreamResponse();
}
```
## 2. Call from the frontend Chat UI
Use the `@ai-sdk/react` hook to wire up the chat component:
```tsx src/components/chat.tsx wrap lines theme={null}
"use client";
import { useChat } from "@ai-sdk/react";
export default function Chat() {
const { messages, input, handleInputChange, handleSubmit } = useChat();
return (
{messages.map((message) => (
{message.role === "user" ? "User: " : "AI: "}
{message.parts.map((part, i) => {
switch (part.type) {
case "text":
return
{part.text}
;
}
})}
))}
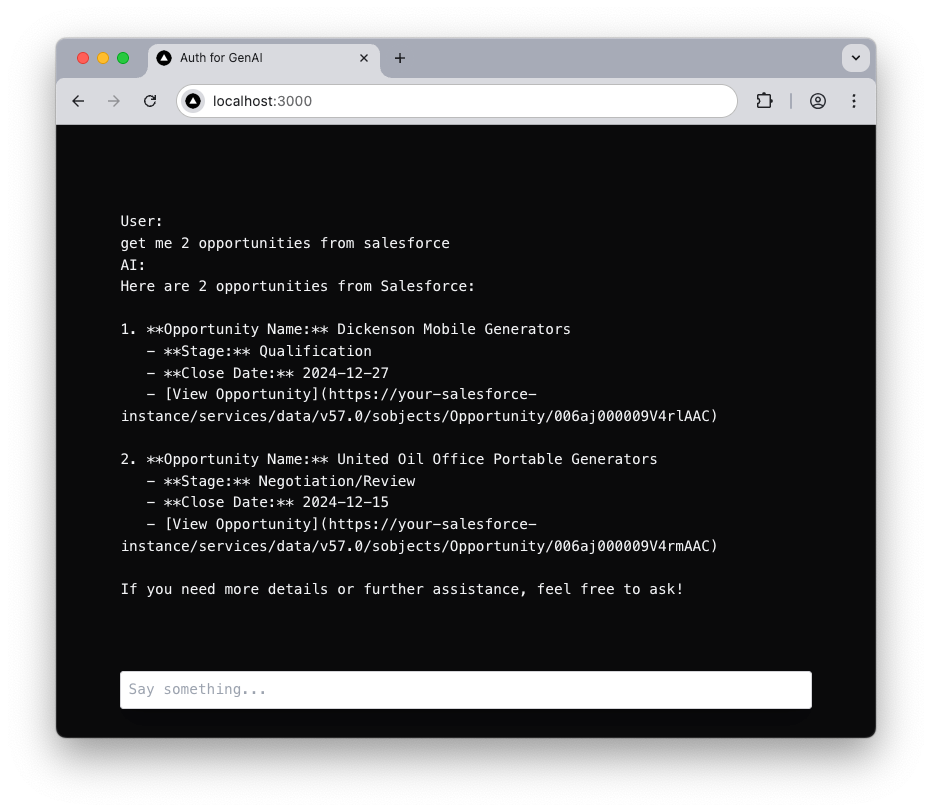 You can customize the chat UI to display structured results in tables, charts, or summaries. When the user sends a message like `Get me 2 opportunities from Salesforce`, GPT-4 interprets the request and invokes the `listOpportunities` tool, which securely calls the Salesforce API using access tokens obtained via Auth0 and returns the results.
Coming soon!
Coming soon!
Coming soon!
You can customize the chat UI to display structured results in tables, charts, or summaries. When the user sends a message like `Get me 2 opportunities from Salesforce`, GPT-4 interprets the request and invokes the `listOpportunities` tool, which securely calls the Salesforce API using access tokens obtained via Auth0 and returns the results.
Coming soon!
Coming soon!
Coming soon!