> ## Documentation Index
> Fetch the complete documentation index at: https://auth0.com/ai/docs/llms.txt
> Use this file to discover all available pages before exploring further.
# User Authentication
> Learn how Auth0 for AI Agents enables AI agents to seamlessly authenticate users.
export const DownloadQuickstartButton = ({category, framework, label = "Download Sample"}) => {
const [isDownloading, setIsDownloading] = useState(false);
const githubRepo = 'auth0-samples/auth0-ai-samples';
const filename = `${category}-${framework}-sample.zip`;
const downloadSample = () => {
setIsDownloading(true);
const downloadUrl = `https://github.com/${githubRepo}/releases/latest/download/${filename}`;
window.open(downloadUrl, '_blank');
setTimeout(() => setIsDownloading(false), 1000);
};
return
;
};
export const AccountAndAppSteps = ({applicationType = "Regular Web Applications", callbackUrl = "http://localhost:3000/auth/callback", logoutUrl = "http://localhost:3000", appCreation = true, allowedWebOrigins, copyDomain, enableTokenVaultGrant = false, enableRefreshTokenGrant = false, enableAllowRefreshTokenRotation = undefined}) => {
const steps = [
To continue with this quickstart, you need to have an{" "}
Auth0 account.
];
if (appCreation) {
steps.push(
Go to your{" "}
Auth0 Dashboard
{" "}
to create a new Auth0 Application.
Scroll down to the Refresh Token Rotation section and {enableAllowRefreshTokenRotation === true ? "enable" : "disable"} the Allow Refresh Token Rotation option.
Scroll down and expand the Advanced section. Switch to the Grant Types tab and enable the Token Vault and Refresh Token grant types.
}
Click Save in the bottom right to save your
changes.
To learn more about Auth0 applications, read{" "}
Applications
.
);
}
return steps;
};
export const Prerequisites = ({callbackUrl = "http://localhost:3000/auth/callback", logoutUrl = "http://localhost:3000"}) => {
return <>
Prerequisites
Before getting started, make sure you have completed the following steps:
{AccountAndAppSteps({
callbackUrl,
logoutUrl
})}
;
};
Authentication is the process of proving a user's identity before granting them access to a resource. In this quickstart, you'll learn how to bring [Universal Login](https://auth0.com/docs/authenticate/login/auth0-universal-login) to your AI agent and leverage OAuth 2.0 and OpenID Connect to securely authenticate users.
When a user authenticates with an identity provider through Auth0, Auth0 can pass user information in an ID token to an application or AI agent to deliver a personalized experience. For example, a chatbot can greet a user with their name and display relevant information based on the user's profile.
By the end of this quickstart, you should have an application that can:
* Sign up and log in using a username and password or a Google account.
* Authenticate and authorize users using OAuth 2.0 and OpenID Connect.
## Pick your tech stack
### Download sample app
Start by downloading and extracting the sample app. Then open in your preferred IDE.
### Install packages
Ensure you have `npm` installed or follow the instructions to [install npm](https://docs.npmjs.com/downloading-and-installing-node-js-and-npm) in its documentation.
In the root directory of your project, install the required packages:
```bash wrap lines theme={null}
npm install
```
### Create your environment file
In the root directory of your project, create a new `.env.local` file and add the following content:
```bash .env.local wrap lines theme={null}
APP_BASE_URL='http://localhost:3000'
AUTH0_SECRET='random 32 byte value'
AUTH0_DOMAIN=''
AUTH0_CLIENT_ID=''
AUTH0_CLIENT_SECRET=''
```
To get your Auth0 application's `AUTH0_DOMAIN`, `AUTH0_CLIENT_ID`, and `AUTH0_CLIENT_SECRET`, navigate to Applications > Applications in the Auth0 Dashboard and select your client application. You'll find these values in the **Basic Information** section at the top.
Copy each value to the matching setting.
Next, run this command to generate a random 32 byte value and copy it to the `AUTH0_SECRET` field:
```bash generate random 32 byte value theme={null}
openssl rand -hex 32
```
### Run your application
Run this command to start your server:
```bash wrap lines theme={null}
npm run dev
```
Visit the URL `http://localhost:3000` in your browser.
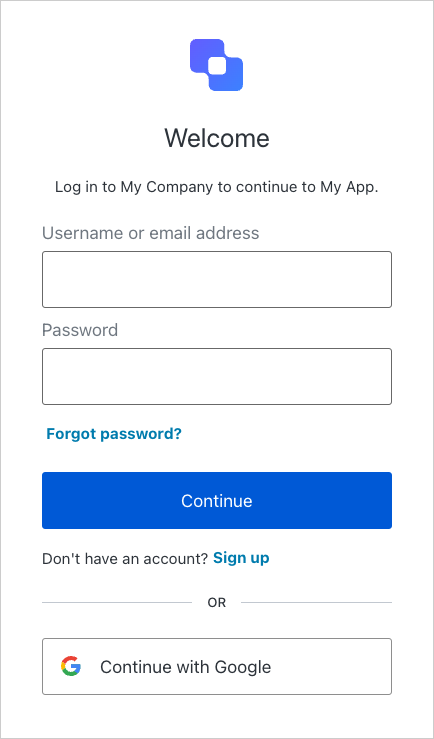
You will see:
Sign up for your application to create a new user account. You will then see a welcome message with your username. You can sign in with that account on future visits.
### Install Auth0 Next.js SDK
In the root directory of your project, install the [Auth0 Next.js SDK](https://github.com/auth0/nextjs-auth0):
```bash wrap lines theme={null}
npm i @auth0/nextjs-auth0@4
```
### Add log in to your application
Secure your application using the Auth0 Next.js SDK.
#### Create your environment file
In the root directory of your project, create or add the following content to your `.env.local` file:
```bash .env.local wrap lines theme={null}
APP_BASE_URL='http://localhost:3000'
AUTH0_SECRET='random 32 byte value'
AUTH0_DOMAIN=''
AUTH0_CLIENT_ID=''
AUTH0_CLIENT_SECRET=''
```
Access your `AUTH0_DOMAIN`, `AUTH0_CLIENT_ID`, and `AUTH0_CLIENT_SECRET` by viewing the Auth0 Application that you created in the Auth0 Dashboard and navigating to the Basic Information section at the top of the Settings tab.
Copy each value to the matching setting.
Next, run this command to generate a random 32 byte value and copy it to the `AUTH0_SECRET` field.
```bash generate random 32 byte value theme={null}
openssl rand -hex 32
```
#### Create the Auth0 client
Create a new file in the `src/lib` directory and name it `auth0.ts`. Add the following code to create a new Auth0 client:
```tsx src/lib/auth0.ts wrap lines theme={null}
import { Auth0Client } from "@auth0/nextjs-auth0/server";
// Create an Auth0 Client.
export const auth0 = new Auth0Client();
```
The Auth0 client provides methods for handling authentication, sessions, and user data.
#### Add the authentication middleware
The middleware intercepts incoming requests and applies Auth0's authentication logic. Create a new file in the `src` directory and name it `middleware.ts` or update your existing middleware file. Add the following code to the file:
```tsx src/middleware.ts wrap lines theme={null}
import { NextRequest, NextResponse } from "next/server";
import { auth0 } from "./lib/auth0";
export async function middleware(request: NextRequest) {
const authRes = await auth0.middleware(request);
// Authentication routes — let the Auth0 middleware handle it.
if (request.nextUrl.pathname.startsWith("/auth")) {
return authRes;
}
const { origin } = new URL(request.url);
const session = await auth0.getSession(request);
// User does not have a session — redirect to login.
if (!session) {
return NextResponse.redirect(`${origin}/auth/login`);
}
return authRes;
}
export const config = {
matcher: [
/*
* Match all request paths except for the ones starting with:
* - _next/static (static files)
* - _next/image, images (image optimization files)
* - favicon.ico, sitemap.xml, robots.txt (metadata files)
* - $ (root)
*/
"/((?!_next/static|_next/image|images|favicon.[ico|png]|sitemap.xml|robots.txt|$).*)",
],
};
```
#### Add Log in and Sign up buttons
Use the following code example to check if the user is signed in or not:
It will display the **Sign up** or **Log in** buttons without a user session. If a user session exists, the app displays a welcome message with the user's name.
```tsx src/app/page.tsx wrap lines highlight={5,7-27, 36} theme={null}
//...
import { auth0 } from "@/lib/auth0";
export default async function Home() {
const session = await auth0.getSession();
if (!session) {
return (
You are not logged in
);
}
//... existing code
// applicable only if you are using the starter template
return (
);
}
```
### Run your application
Start your app, typically with this command:
```bash wrap lines theme={null}
npm run dev
```
Visit your app in the browser, typically at `http://localhost:3000`.
You will see:
Sign up to your application to create a new user account. You will then see a welcome message with your user name. You can sign in with that account on future visits.
### View a complete example
Want to see how it all comes together? Explore or clone the fully implemented sample application on [GitHub](https://github.com/auth0-samples/auth0-ai-samples/tree/main/authenticate-users/vercel-ai-next-js).
### Download sample app
Start by downloading and extracting the sample app. Then open in your preferred IDE.
The project is divided into these two folders:
* `backend`: contains the backend code for the web application, an API written in Python using FastAPI and the LangGraph agent.
* `frontend`: contains the frontend code for the web application written in React as a Vite Single Page App (SPA).
### Install backend packages
In the `backend` directory of your project, install the required packages using your preferred package manager, such as `uv`. You can follow the instructions to [install uv](https://docs.astral.sh/uv/getting-started/installation/) in its documentation.
```bash wrap lines theme={null}
cd backend
uv sync
```
### Create your environment file
In the `backend` directory of your project, create a new file and name it `.env` and add the following content:
```bash .env wrap lines theme={null}
APP_BASE_URL='http://localhost:8000'
AUTH0_SECRET='random 32 byte value'
AUTH0_DOMAIN=''
AUTH0_CLIENT_ID=''
AUTH0_CLIENT_SECRET=''
```
Access your `AUTH0_DOMAIN`, `AUTH0_CLIENT_ID`, and `AUTH0_CLIENT_SECRET` by viewing the Auth0 Application that you created in the Auth0 Dashboard and navigating to the Basic Information section at the top of the Settings tab.
Copy each value to the matching setting.
Next, run this command to generate a random 32 byte value and copy it to the `AUTH0_SECRET` field.
```bash generate random 32 byte value theme={null}
openssl rand -hex 32
```
### Install frontend packages
Ensure you have `npm` installed or follow the instructions here to [install npm](https://docs.npmjs.com/downloading-and-installing-node-js-and-npm).
Navigate to the `frontend` directory of your project and install the required packages:
```bash wrap lines theme={null}
cd frontend
npm install
```
### Run your application
To run your application, start both the FastAPI backend and the frontend in two terminals:
1. In one terminal, start the FastAPI backend:
```bash wrap lines theme={null}
cd backend
source .venv/bin/activate
fastapi dev app/main.py
```
2. In a second new terminal, start the frontend:
```bash wrap lines theme={null}
cd frontend
npm run dev
```
Visit the URL `http://localhost:5173` in your browser.
You will see:
Sign up to your application to create a new user account. You will then see a welcome message with your user name. You can sign in with that account on future visits.
## Next steps
* To set up first-party tool calling, complete the [Call your APIs on user's behalf](../get-started/call-your-apis-on-users-behalf) quickstart.
* To set up third-party tool calling, complete the [Call other's APIs on user's behalf](../get-started/call-others-apis-on-users-behalf) quickstart.
* Learn more about [User Authentication](/intro/user-authentication).
 Sign up for your application to create a new user account. You will then see a welcome message with your username. You can sign in with that account on future visits.